> ## Documentation Index
> Fetch the complete documentation index at: https://docs.synscribe.com/llms.txt
> Use this file to discover all available pages before exploring further.
# How to set up image generators for on-brand blog images
> Set up a branded image generator once so every blog post gets on-brand featured, OG, and CTA images.
Set an image generator up once and every blog post comes out on-brand: the featured image at the top, the OG image for social previews, and the CTA banners that get inserted into the body. The quickest way is to ask Pi. Send `help me setup my image generator for [domain]` and paste a screenshot of your site; Pi reads your colors, fonts, and logo and builds the brand for you. You can also build one by hand under Settings, in **Image Generator** (`/app/image-generator`). Once it's set up, [creating a post](/platform/creating-blogs) and [refiners](/platform/set-up-refiners) can pull these images in for you.
## Ask Pi to set it up
The fastest path. Give Pi the domain and a screenshot of the site in the same message:
```text theme={null}
help me setup my image generator for [domain]
```
Pi looks at the styles, the main colors, and the logo on your site and pieces them together into a brand template.
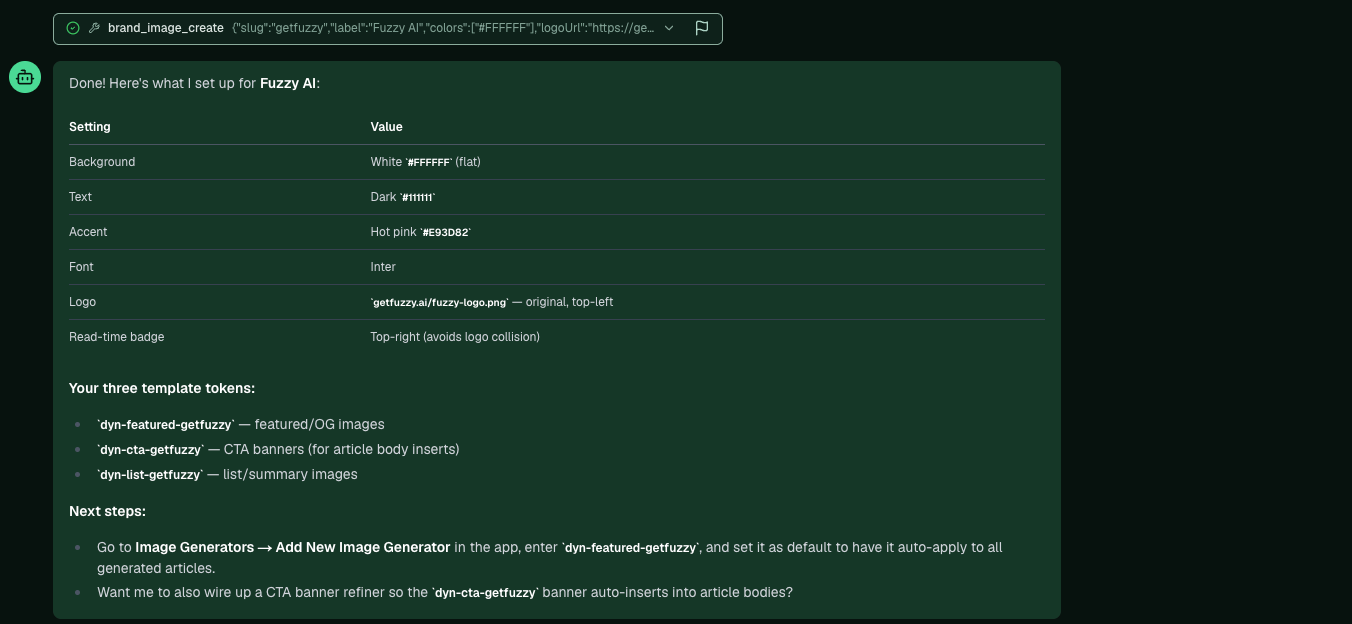
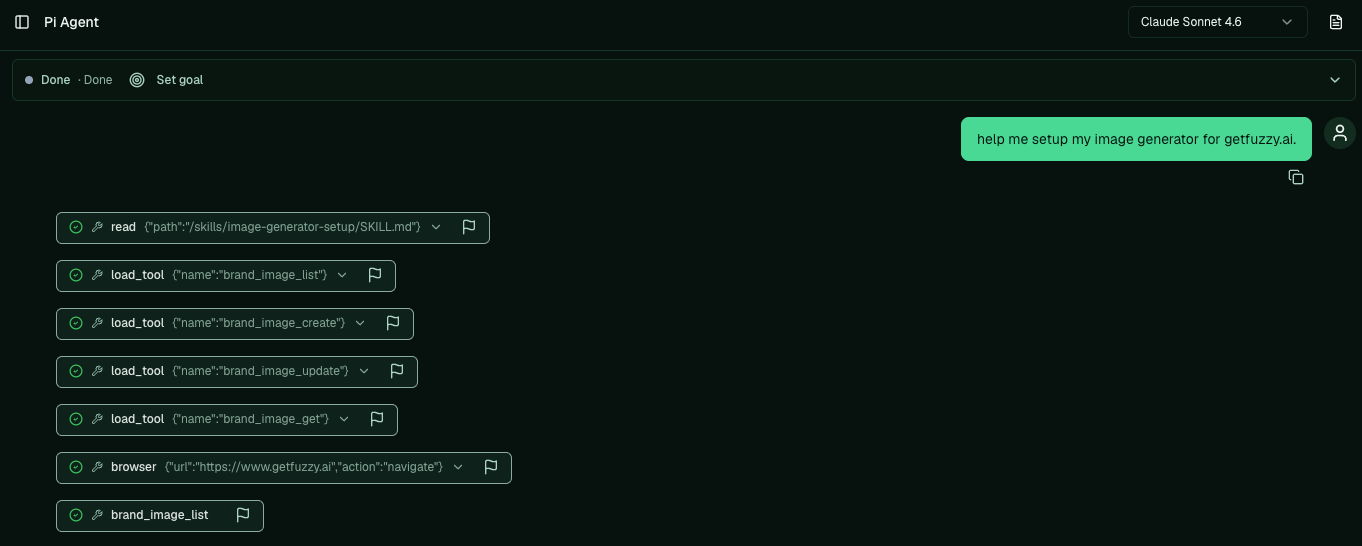 When it finishes, Pi shows you exactly what it configured: background, text and accent colors, font, logo, and the three template tokens it created (`dyn-featured-[slug]`, `dyn-cta-[slug]`, `dyn-list-[slug]`).
 ## Find it in the app
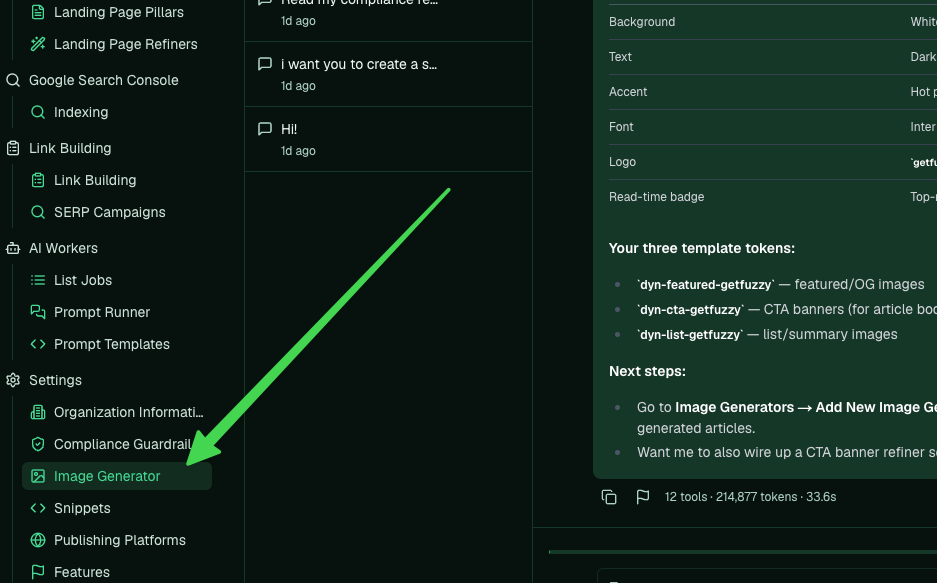
Open **Image Generator** from the left sidebar, under Settings.
## Find it in the app
Open **Image Generator** from the left sidebar, under Settings.
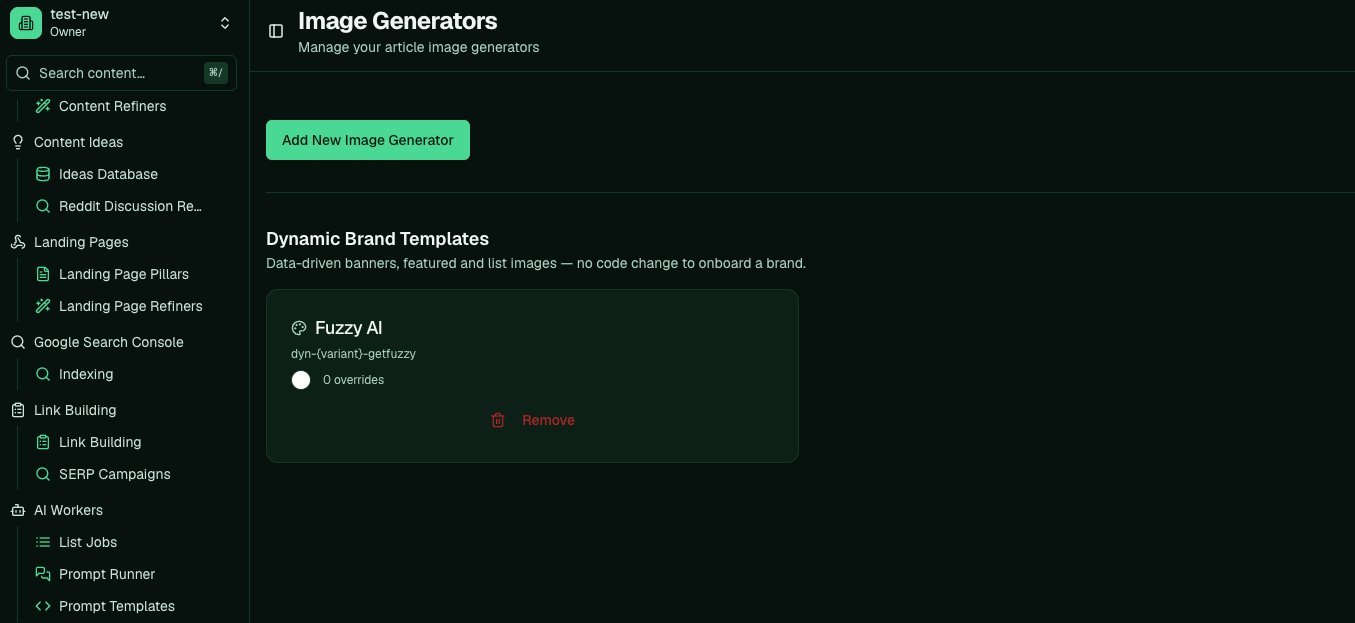
 If Pi already set one up, it shows under Dynamic Brand Templates. Refresh the page if it isn't there yet. Each brand is one card, with a **Remove** control and a way into the editor.
 ## What you can edit
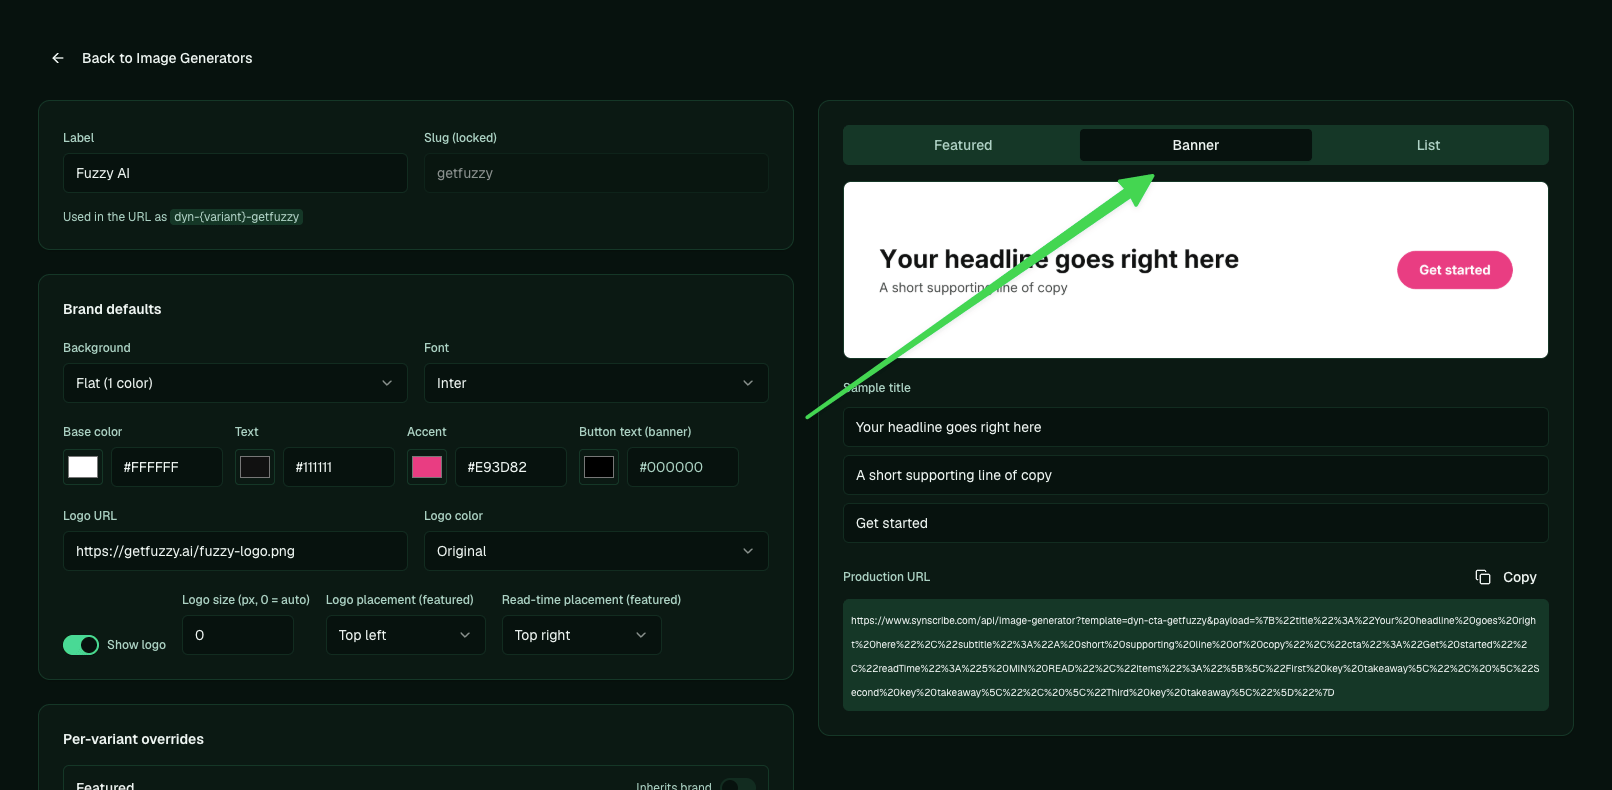
Open the brand to tune it by hand, or to check what Pi built. You control the base and text colors, the accent color, the font, and the logo (URL, color mode, size, and placement). A live preview on the right shows each variant:
* Featured is the image at the top of a post, also used as the OG image for social and share previews.
* Banner is the CTA image that gets inserted into the article body, with its own button text.
* List is for list and summary images.
## What you can edit
Open the brand to tune it by hand, or to check what Pi built. You control the base and text colors, the accent color, the font, and the logo (URL, color mode, size, and placement). A live preview on the right shows each variant:
* Featured is the image at the top of a post, also used as the OG image for social and share previews.
* Banner is the CTA image that gets inserted into the article body, with its own button text.
* List is for list and summary images.
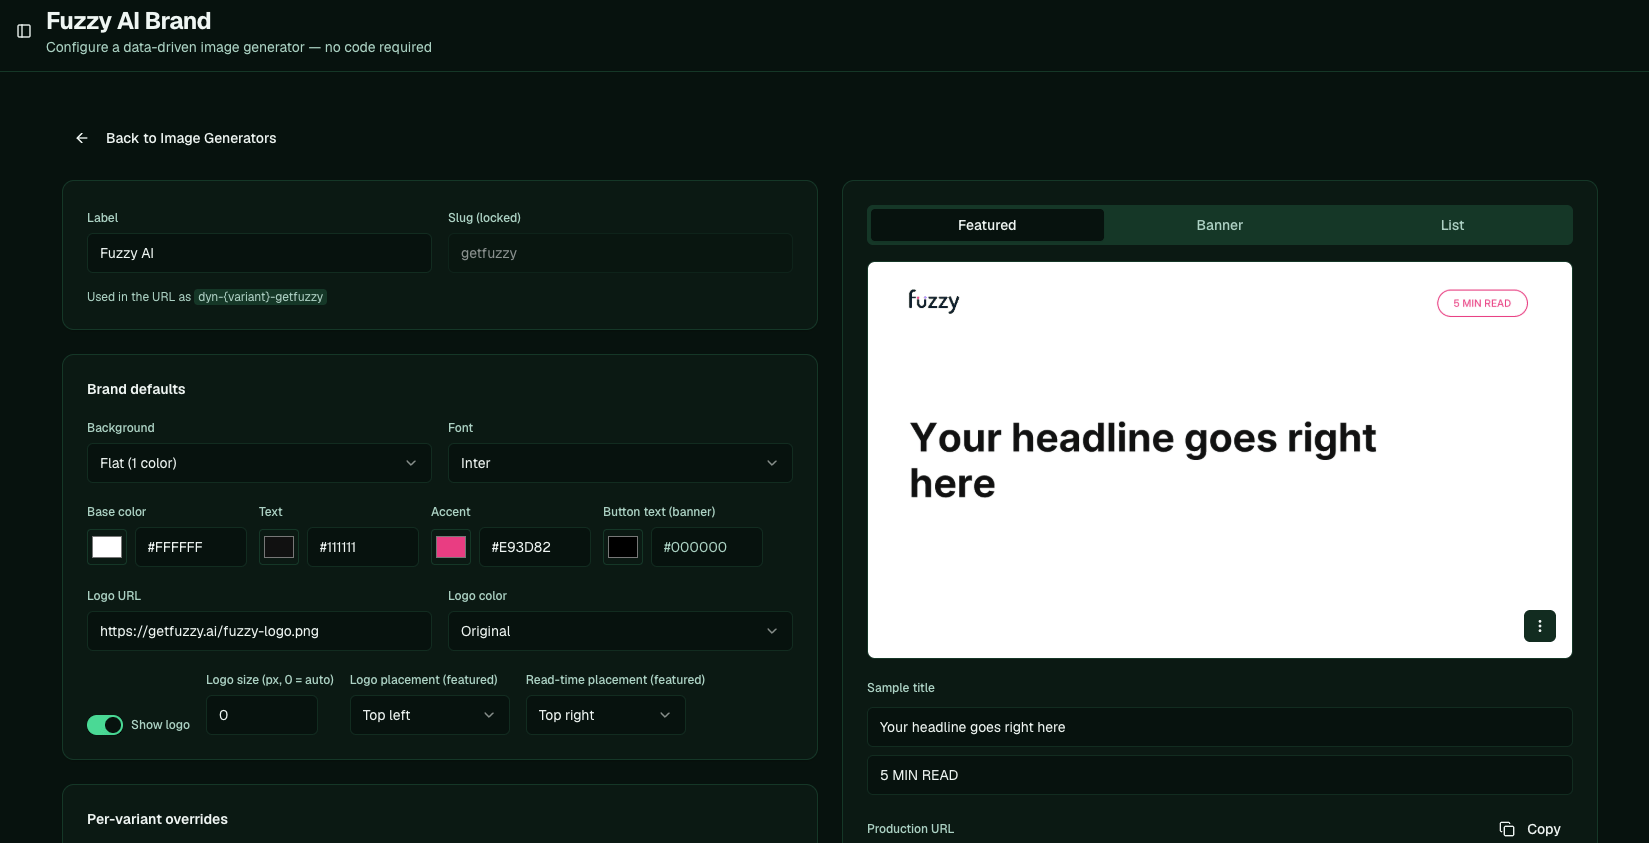 Switch tabs to preview each one. Each variant can inherit the brand defaults or override them.
 ## Set it as the default
For a brand to auto-apply to every generated article, add it as an image generator: on the Image Generators page, click **Add New Image Generator**, enter the featured token (`dyn-featured-[slug]`), and set it as the default.
## Use it
Two ways the images get used:
* Automatically, once the brand is the default. Generated posts pick up the featured image, and refiners can insert the CTA banner into the body. That auto-insertion is the [refiner](/platform/set-up-refiners) step.
* On demand. Tell Pi you made a blog post and want an image, then copy the result and drop it wherever you need it.
**Next:** [Set up refiners](/platform/set-up-refiners)
## Set it as the default
For a brand to auto-apply to every generated article, add it as an image generator: on the Image Generators page, click **Add New Image Generator**, enter the featured token (`dyn-featured-[slug]`), and set it as the default.
## Use it
Two ways the images get used:
* Automatically, once the brand is the default. Generated posts pick up the featured image, and refiners can insert the CTA banner into the body. That auto-insertion is the [refiner](/platform/set-up-refiners) step.
* On demand. Tell Pi you made a blog post and want an image, then copy the result and drop it wherever you need it.
**Next:** [Set up refiners](/platform/set-up-refiners)